4/49
)
)
)
)
)
)
)
)

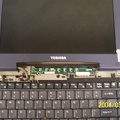
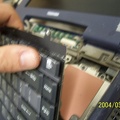
Remove the screws from the top of the keyboard.
- Created on
- Monday 8 March 2004
- Posted on
- Tuesday 1 March 2011
- Albums
- Visits
- 3538
These are photos taken in the early years, before using facebook and google photos.
Remove the screws from the top of the keyboard.
0 comments